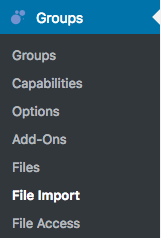
 In the Groups > File Import section you can upload files via FTP and import them.
These facilities are provided:
- Import Files : Import uploaded files in bulk.
- Export Files : Create a text file with current data from the the Groups > Files section.
- Scan for Files : Create a text file with data for the files located in the managed folder* or directory.
These facilities provide everything needed to handle file imports for files that should be handled and protected by Groups File Access. Details about each section are provided in what follows.
Import Files
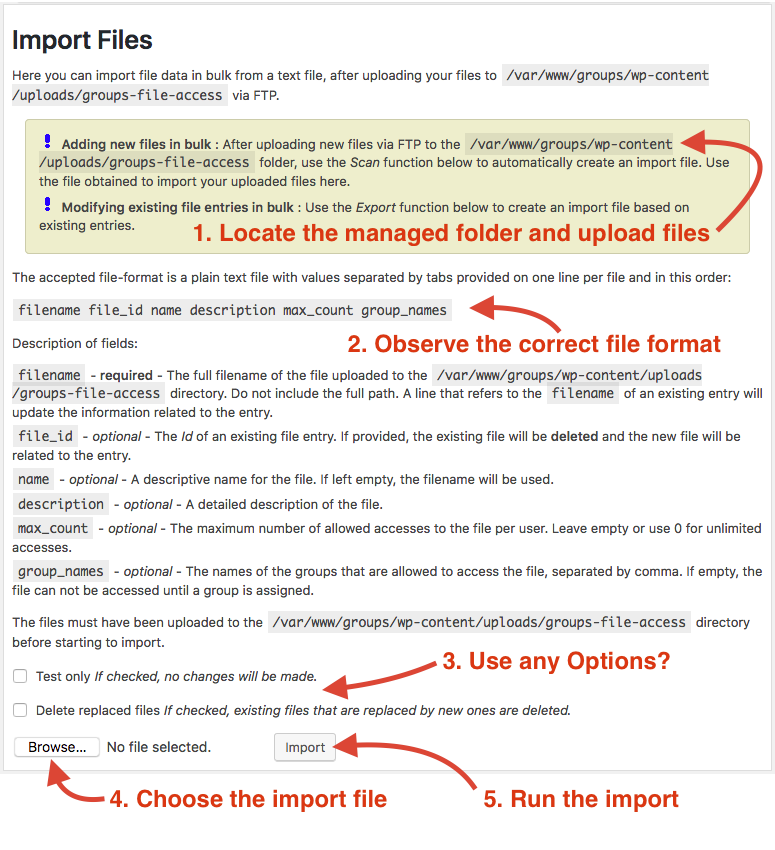
Here you can import file data in bulk from a text file, after uploading files via FTP to the folder managed by Groups File Access. On the server used here for example, this folder is:
/var/www/groups/wp-content/uploads/groups-file-access
… we refer to this as the *managed folder – but this obviously can be a different one depending on your server and the location of the wp_content and uploads folders. The section will show you the corresponding path on your system.
You will see that there are two options that can be used during your imports:

- Test only : If this option is enabled when you run the import, no file entries will be created. But you will obtain information about what would happen during the import. This includes how many files would have been imported, if any invalid lines were detected and which ones along with any detected errors.
- Delete replaced files : If this option is enabled during import, any existing files will be deleted if they are replaced by new ones. Also see the notes on the
filenamefield below.
The accepted file-format is a plain text file (ideally UTF-8 encoded) with values separated by tabs provided on one line per file and in this order:
filename file_id name description max_count group_names
Please note that you do not include the above as the first line, it’s just an outline of which fields are expected (required or optional).
Description of fields:
filename– required – The filename of the file uploaded to the managed folder – only indicate the filename and do not include the full path. A line that refers to thefilenameof an existing entry will update the information related to the entry. For an existing entry, if a different filename is indicated, this will replace the existing file. If the option the “Delete replaced files” is enabled, the old file will be deleted from the managed folder.file_id– optional – The Id of an existing file entry. If provided, the existing file will be deleted and the new file will be related to the entry.name– optional – A descriptive name for the file. If left empty, the filename will be used.description– optional – A detailed description of the file.max_count– optional – The maximum number of allowed accesses to the file per user. Leave empty or use 0 for unlimited accesses.group_names– optional – The names of the groups that are allowed to access the file, separated by comma. If empty, the file can not be accessed until a group is assigned.
Important: The files must have been uploaded to the managed folder before starting to import.
Export Files
Here you can create a text file with current data for all files managed in the Groups > Files section. The file format corresponds to the supported import file-format used to import files.

You can use this to modify existing file entries in bulk or prepare an import on another instance, for example when you move from a development to a production site.
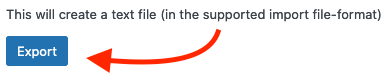
This will create a text file (in the supported import file-format) with current data for all files managed in the Groups > Files section.
An additional export feature provides download statistics per file and user. You will find the link Export File Access Table in this section to download the data.

This provides a text files with several entries per file and user, separated by tabs so it’s easy to use with a spreadsheet. This link provides the stats for all users and files on record.
Although there is no specific user interface for it, for those who might need a more specific set of download data, you can add the following URL parameters to the URL that the link points to:
- file_id : to obtain data for a specific file
- user_id : to obtain data for a specific user
- limit : provide up to so many entries
- offset : requires the limit parameter to be indicated, apply an offset to skip as many first entries as indicated by this parameter
So for example, if your export link points to http://example.com/wp-admin/admin.php?page=groups-admin-import-files&action=export_file_access&gfa-export-file-access=xxxxxxxxxx and you only want to get the first 100 entries, you could instead access this URL http://example.com/wp-admin/admin.php?page=groups-admin-import-files&action=export_file_access&gfa-export-file-access=xxxxxxxxxx&limit=100 or if you wanted to obtain the second two hundred entries you could use http://example.com/wp-admin/admin.php?page=groups-admin-import-files&action=export_file_access&gfa-export-file-access=xxxxxxxxxx&limit=100&offset=100
Or if you want to obtain file access data for the user whose ID is 123, you could use http://example.com/wp-admin/admin.php?page=groups-admin-import-files&action=export_file_access&gfa-export-file-access=xxxxxxxxxx&user_id=123
If you wanted to obtain all file access data for a specific file, you can add the file_id parameter, for example http://example.com/wp-admin/admin.php?page=groups-admin-import-files&action=export_file_access&gfa-export-file-access=xxxxxxxxxx&file_id=456
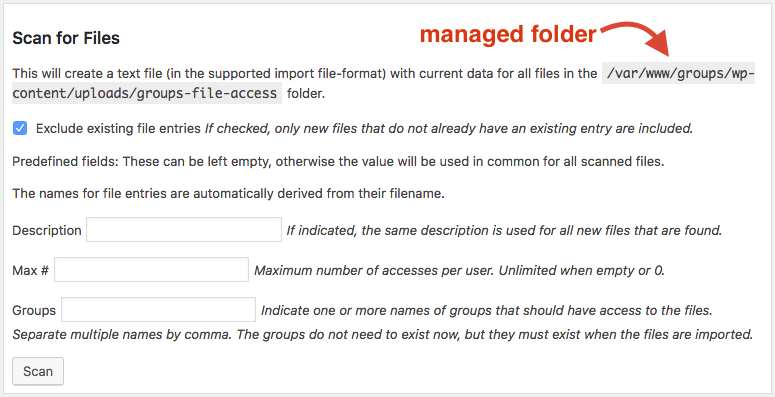
Scan for Files
Here you can prepare a text file based on the files located currently in the managed folder. This will create a text file (in the supported import file-format) with current data for all files in the folder managed by Groups File Access.
So why would you want to use this? You can simply upload all files you want to import to the managed folder, scan and import them.
- Upload files you want to import to the managed folder.
- Scan the files.
- Review the text file that the scan has created and edit details like filenames, descriptions and groups as desired.
- Import them based on the reviewed text file.