The Groups File Access extension provides several settings and useful information. Go to Groups > File Access on your WordPress dashboard to review these and make adjustments if necessary.
Storage
Uploads
In this section, the extension reports on folders used and their protection, particularly:
- the system folder where files that are handled by the extension are uploaded
- how access is protected
You will find this information presented similar to e.g.:
Files are uploaded to the
/var/www/groups/wp-content/uploads/groups-file-accessdirectory.Access to files in
/var/www/groups/wp-content/uploads/groups-file-accessis protected by an.htaccessfile in that directory.The directory listing is hidden through an
index.htmlin/var/www/groups/wp-content/uploads/groups-file-access.
The above would correspond to a WordPress installation located within a folder called groups. Of course this will likely differ from the information shown for your particular setup.
Amazon S3
Here you can enable support for files hosted on Amazon S3. If you do wish to serve protected files which are stored on Amazon S3, you will need to enable this here and provide the Access key ID and Secret access key.
- Enable Amazon S3 file access : must be checked to provide protected files stored on your Amazon S3
- Access key ID : provide the corresponding Access key ID of the IAM user that is allowed to access the files; this user should have appropriate read access permissions only
- Secret access key : provide the Secret access key of the IAM user
- Expiration : this determines for how long generated URLs are valid
- Direct Object URLs : If this option is enabled, access to files is provided via temporary Object URLs which point directly to the object on Amazon S3. If the option is disabled, access to files is provided via URLs whose basis is the URL of your WordPress site. In this case, the Redirect to Object URLs will determine how the files are served.
- Redirect to Object URLs : When this is disabled, files hosted on Amazon S3 are served by using your WordPress site’s server as a proxy – it will appear as if the files were stored and hosted on your server, when in reality your server just pulls the data from the Amazon S3 object and passes it through to the receiving client. You still get the benefit of saving space on your server, but serving files will consume bandwidth from your server. When this is enabled, requests to files are redirected to the corresponding URL of the object stored on If this option isThis option is available only when the Direct Object URLs option is disabled.
The tutorial How to protect Amazon S3 Files with WordPress for Members provides detailed steps on how to configure and use Groups File Access and Amazon S3 together.
Serving Files
MIME Types
Here you have the option to enable or disable the use of specific MIME types as the content type for files served via the extension.
Content Disposition
 An
An inline content-disposition means that the file should be automatically displayed. An attachment content-disposition, is not displayed automatically and requires some form of action from the user to open it.
Session Access
Here you can enable temporary access URLs and specify an access timeout.
Enable temporary access URLs
If enabled, all file URLs and links that are rendered using the [groups_file_url] or the [groups_file_link] shortcode will have a session access identifier appended automatically for authorized users.
These URLs grant access to files without the need to be logged in.
Session access can be granted for specific files without the need for this option to be enabled, by specifying the session_access="yes" shortcode attribute.
Temporary access timeout
Temporary access is valid during the period of time established through the timeout.
If the temporary URL has not been accessed during that period of time, the link is invalid and access is refused.
The time period is extended for the duration of the timeout while the URL is accessed.
Notifications
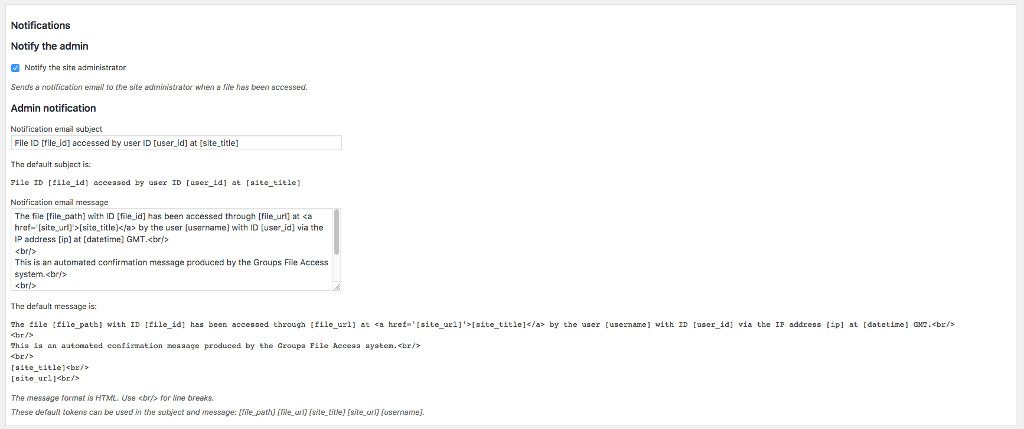
Notifications for the site administrator when a file has been accessed can be enabled and configured here.
These tokens can be used in the subject and message:
[file_id]The ID of the file served.[file_path]The file path of the file served.[file_url]The URL of the file served.[ip]The IP address to which the file is served.[server_ip]The IP address of the server.[referrer]The HTTP referrer string.[request_uri]The request URI string.[request]The request data.[datetime]The date and time at which the file has been served.[site_title]The title of the site.[site_url]The URL of the site.[user_id]The ID of the user to whom the file has been served.[username]The username of the user to whom the file has been served.
The tokens are substituted in the notification message with their corresponding values for the file access.
User Profiles
The extension provides the following options to show service keys and accessible files in user profiles:

- Always show service keys and files to users who can administer Groups : If enabled, administrators of the Groups plugin will see both the service key and the files accessible on users’ profiles.
- Show service keys in user profiles : If enabled, users will find their service key visible on their WordPress dashboard profile page.
- Show files in user profiles : If enabled, users will find links to the files they have access to, on their WordPress dashboard profile page.
The first option will show both service keys and accessible files to administrators of the Groups plugin when they visit any user’s profile on the WordPress dashboard.
The other two options will show that information when a user visits his profile page on the WordPress dashboard.

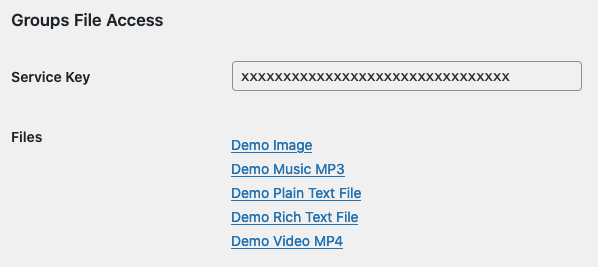
With the options to show the service key and files enabled, a user can see the relevant information on his WordPress dashboard profile page
All options are disabled by default and can be used to show the related information independently
For example, you might want to enable the first option to make it easy for an administrator to check if the service key used by an account is valid.
If you let users access the WordPress dashboard, showing them their service key within their user profile can be useful. You might also consider enabling the option to show them their files, as they will be able to access them from this centralized place.
Showing the Service Key and Files on the User Profile with WooCommerce
Note that if you are using WooCommerce, the access to the WordPress dashboard is disabled for customers by default. If you would like to enabled access in general, please refer to this guide. Alternatively, you can grant the view_admin_dashboard capability to customers who may access the dashboard. You can do this easily with Groups:
- Go to Groups > Capabilities and look for the
view_admin_dashboardcapability. If it is not included, refresh the capabilities. If it is still not included after refreshing, create theview_admin_dashboardcapability manually. - Add this capability to a group. For example, you could create a new group named Dashboard Access and add the
view_admin_dashboardcapability to it. - Now you can add any customers who may access the WordPress dashboard to the Dashboard Access group.
Redirect
The extension provides an option that can be enabled here to redirect to the WordPress login when a visitor who is not logged in tries to access a protected file.
Delete Data
This section is provided particularly to clean up after tests. The options outlined here should never be left enabled on a live production site.
The plugin provides two data deletion option. The Groups plugin must be activated for these to take effect.
If the upload folder is deleted while the Groups File Access plugin is activated, deactivate and reactivate the plugin.
Serving large files
Depending on the existing configuration, it might be necessary to adjust some directives.
PHP Configuration for Large Files
If you want to serve large files, you might need to adjust your php.ini.
For example, to serve files up to 128M:
upload_max_filesize = 128M

post_max_size = 129M

max_execution_time = 300
See also:
nginx Configuration for Large Files
Under nginx the client_max_body_size directive should also be adjusted accordingly within a http, server or location context. This can be done in the server configuration file /etc/nginx/nginx.conf or in a site-specific configuration file similar to /etc/nginx/sites-available/default :
server {
    client_max_body_size 128M;
}
See also:
nginx
If you are using nginx, the folder managed by Groups File Access that holds protected files must be protected by adding the appropriate location rule to the configuration file.
Under Uploads note the path of the directory where files are uploaded. Use the path with the location directive, adding these lines in the nginx configuration file:
location /var/www/groups/wp-content/uploads/groups-file-access {

deny all;

}
In the above example, the folder we must protect is /var/www/groups/wp-content/uploads/groups-file-access.
For large files, see above under Serving large files and make sure that the client_max_body_size directive is set accordingly.
IIS
Note: We do not recommend IIS. If you have no other choice, please make sure to protect the files handled by Groups File Access as indicated below.
If you are using IIS, the files managed by Groups File Access will be unprotected unless you use Request Filtering or other means to avoid direct access to the files.
The following instructions are based on IIS 7, similar instructions should apply if your version differs, or use the zip file provided below.
Open IIS Manager and on the left side under Connections select the site where Groups File Access has been installed. Expand the tree until you get to wp-content/uploads. The groups-file-access directory is a subdirectory that has been created by Groups File Access. Select the uploads directory in the Connections pane, double-click on Request Filtering in the middle pane, click Add Hidden Segment… in the right pane and in the dialog box that appears, input groups-file-access and click OK.
This will create a web.config (click to download a zipped version) in the uploads directory which protects direct access* to the files.
* Access to their URL within wp-content/uploads/groups-file-access is protected, this is different from the URL provided by Groups File Access which grants access to these files to authorized users.
See also:
Moving to another Server
IMPORTANT : Make a full backup of your WordPress site and database before moving and before running any MySQL query on its database.
If you are moving your WordPress installation to another server, file paths will most likely change. This requires an update of one of the database tables used by Groups File Access which must be done using the following replacement MySQL query (the paths must be adjusted before you execute the query) :
UPDATE wp_groups_file SET path = REPLACE( path, '/var/www/groups/wp-content/uploads/groups-file-access/', '/www-docs/wordpress/wp-content/uploads/groups-file-access/' );In this example we assume that your files were located in /var/www/groups/wp-content/uploads/groups-file-access/ on the old server and are placed in /www-docs/wordpress/wp-content/uploads/groups-file-access/ on the new server. You can see the new location used under Uploads the path of the directory where files are uploaded is shown.
The query can be run directly on the command line of your MySQL client or through phpMyAdmin.


