Set up a Premium group
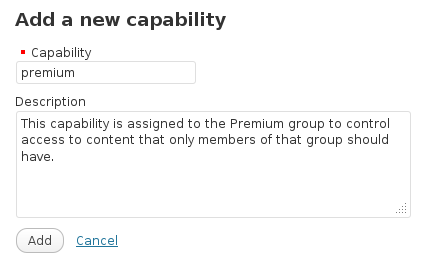
Go to Groups > Capabilities and click New Capability. Enter premium in the Capabilityfield and click Add.
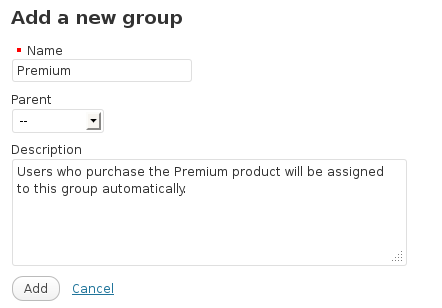
Go to Groups > Groups and add click New Group. Enter Premium in the Name field and click Add.
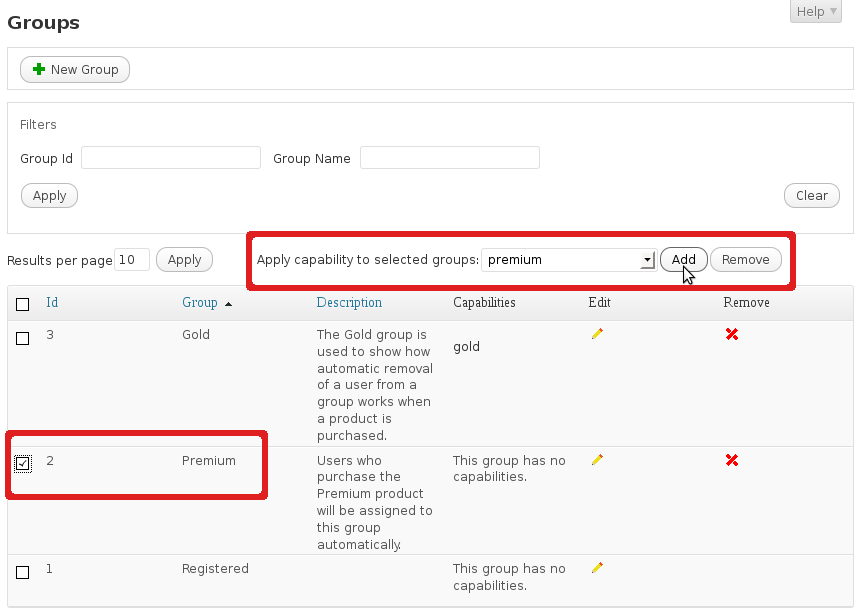
In the table, check the box for this group in the first column, select premium in the dropdown on top of the table and click Add. You should now see premium appear in the Capabilitiescolumn of the Premium group.
Go to Groups > Options and check the box for the premium capability under Access restrictions and click Save at the end of the page. You will now be able to protect your posts with the premium capability. Only members of the Premium group will have access to these.
Set up a Premium Membership product
Option A : As a normal product
Go to Products > Add New to create a new product:
Name the product Premium Membership or any name you find more suitable.
In the Product Data panel below the description:
– select Virtual as the Product Type to offer membership based on a one-time fee
You can also use group memberships for other product types if desired, for example support pages that only clients should be allowed to access.
Also in the Product Data panel:
– set up the product’s price in the General tab
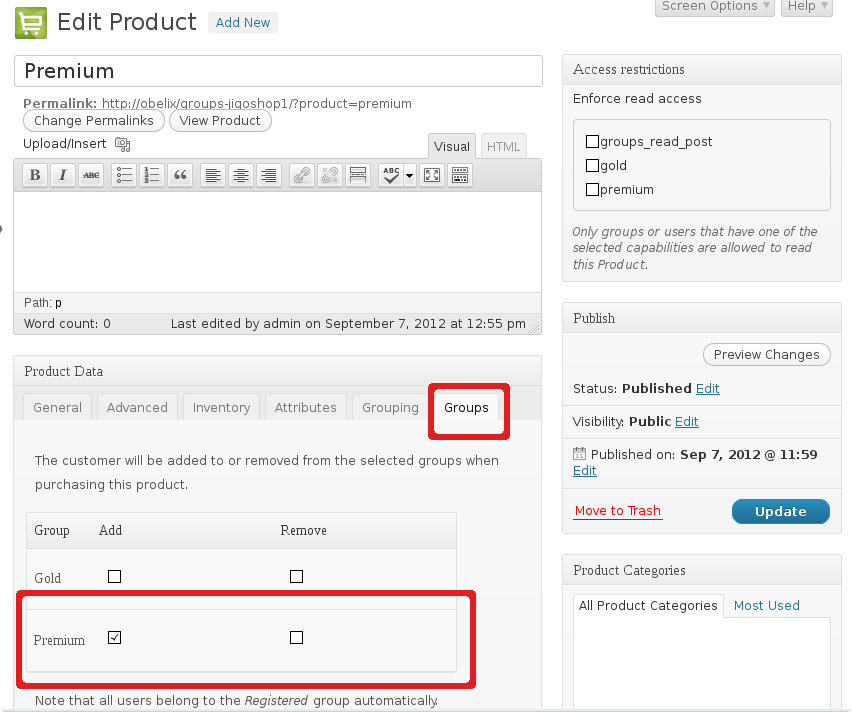
– click the Groups tab and check the box for Premium
Now click Publish to create your new membership product.
Option B : As a subscription
Go to Products > Add New to create a new product:
Name the product Premium Subscription or any name you find more suitable.
In the Product Data panel below the description:
– select Subscription as the Product Type to offer membership based on a recurring fee
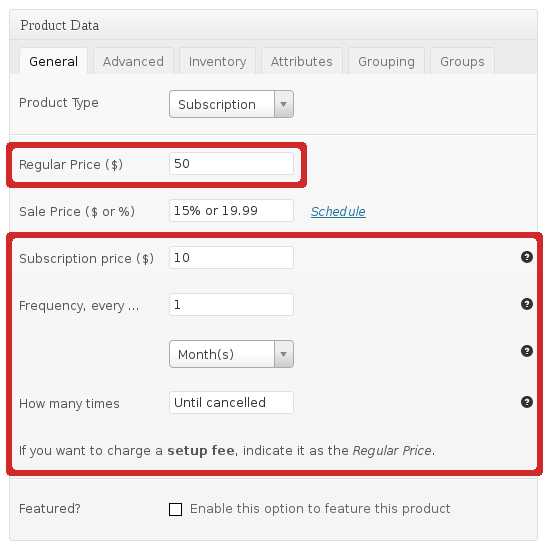
Publish the new product or save it as a draft. The General tab in the Product Data panel now offers subscription pricing options where the desired payment cycle, recurring fee and optional setup price can be specified.
The options allow for very flexible subscription payments, including daily, weekly, monthly and yearly payments as well as configurable payment frequencies that allow for example to receive a payment every 15 days or every 3 months.
- If set, the Regular Price determines the setup fee to be charged at the beginning of the subscription.
- The Subscription price is the recurring fee to be charged as determined by the Frequency.
- The Frequency determines whether payments should be received every X days, weeks, months or years.
- How many times determines the number of payments to receive and when left unspecified, allows for open subscriptions that remain active while payments are received.
In the Product Data panel:
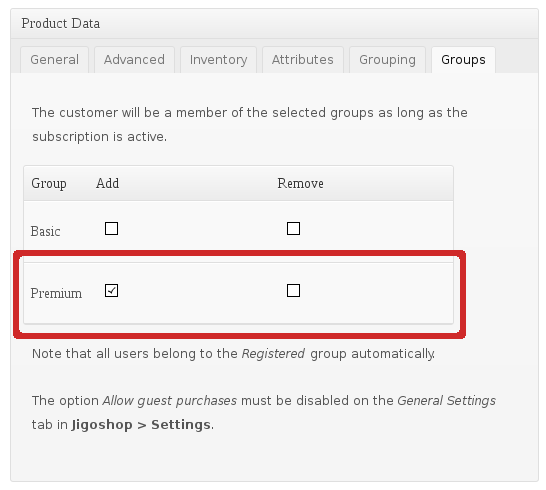
– click the Groups tab and check the box for Premium
Now click Publish to create your new subscription.
Set up a page for Premium members only
Go to Pages > Add New to create a new page:
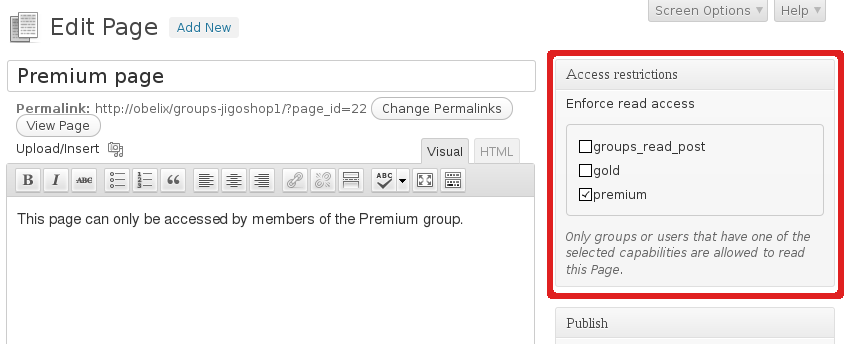
In the Access restrictions tab check the box for premium and click Publish to create the page.
This page is now only accessible to members of the Premium group. For more options to protect your content please refer to the Groups Plugin and Groups Documentation.
Subscriptions
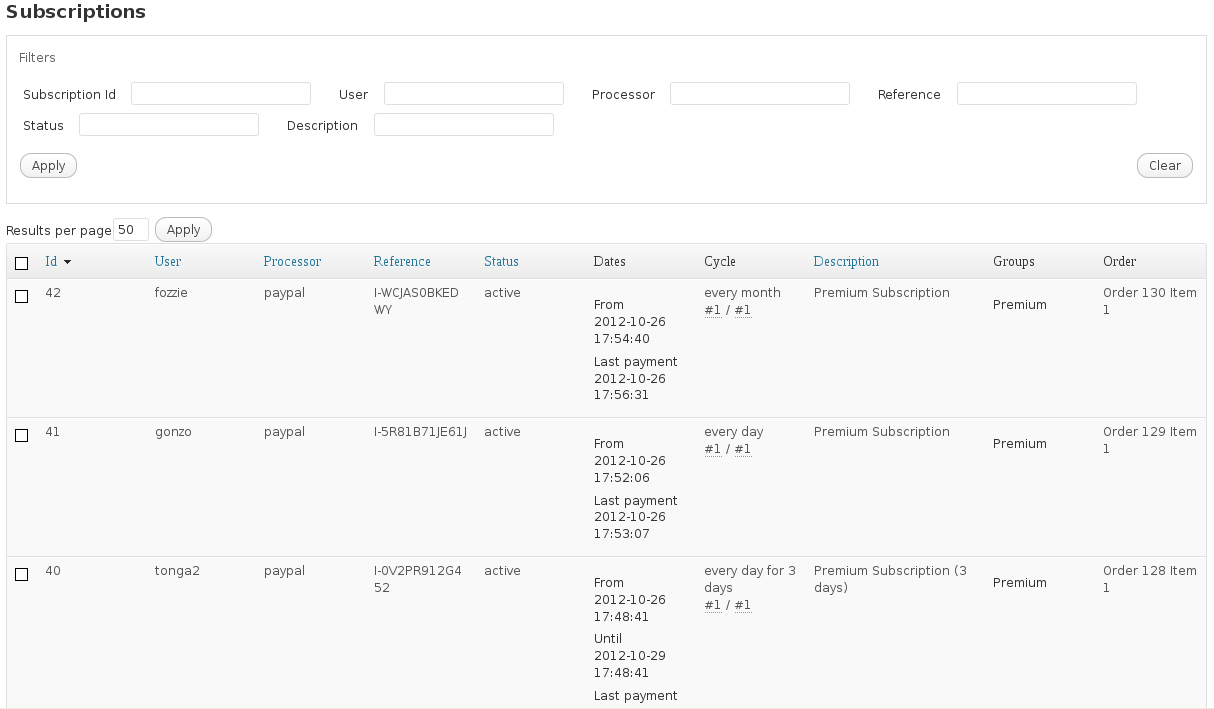
The subscriptions that are created can be viewed under Groups > Subscriptions where details are shown for each entry. Valid subscriptions show their status as active as long as the necessary payments are received. Subscriptions are initially inactive until the initial payment is received. Subscriptions that have reached their end of term will show as completed. Subscriptions with overdue payment are suspended. A subscription can be cancelled in which case the group membership for the related user will be maintained while the cycle for the last payment received lasts.
Subscription Settings
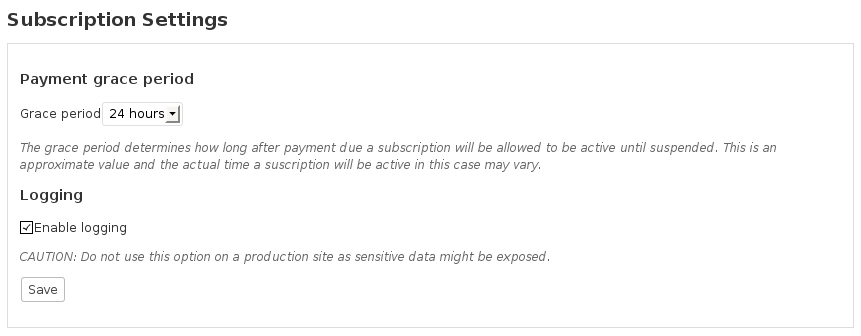
Under Groups > Subscription Settings the grace period for subscription payments can be set. The grace period determines the amount of time that a subscription will be maintained active after payment is overdue until it is suspended. This is an approximate value and the actual time a subscription will be active in this case may vary.
A logging facility is provided which is intended for development and issue resolution. On production sites this option should be turned off and the log file that is written to wp-content/plugins/groups-subscriptions/lib/log/log.txt or wp-content/debug.logshould be removed as it may contain transaction and personal data.
Integration options
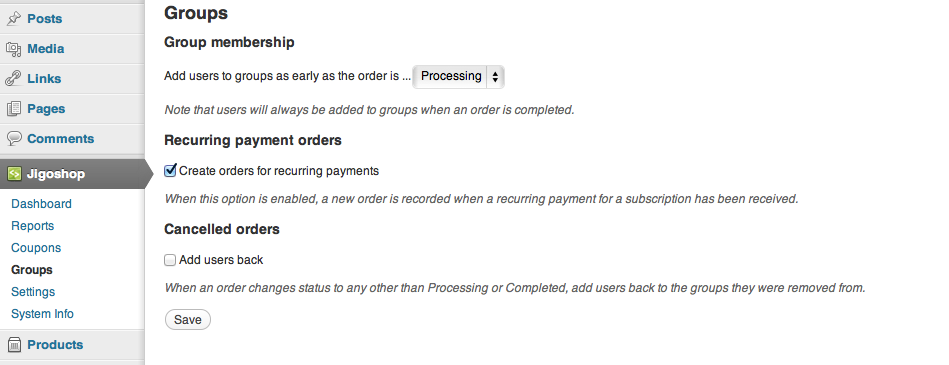
Specific integration options can be set under Jigoshop > Groups. This includes the option to add users to groups as early as an order is processing, which is advisable unless orders are completed automatically or a manual confirmation is desired.

