
The plugin is installed via the WordPress Dashboard, using the provided zip file.
- Log in as an administrator and go to Plugins > Add New > Upload Plugin.
- Click the Choose File button and locate the Itthinx Mail Queue plugin file that you have obtained via Itthinx Mail Queue.
- Click the Install Now button.
- Now activate the plugin.
- Proceed to configure the plugin, following the indications provided under Setup.
Alternatively, the plugin can also be installed via FTP, see Manual Plugin Installation.
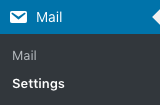
The new Mail Menu
Once the plugin has been installed and activated, a new Mail menu is added to your WordPress dashboard.
To configure the plugin, you should first go the the Settings. There you will find appropriate configuration options which are documented here in the Setup section.
Once you have configured the plugin, you can check the mail queue which is described in the Mail Queue section of this documentation.